We often have buyers who have a home to sell. The most common advice that their Realtors tell them to do to sell their homes quickly is to work on their curb appeal. Now to some people that might sound like a huge task, but it can be pretty easy and fairly inexpensive if you are willing to put a little elbow grease into it!
We have a home for sale at 7017 Meandering Creek in Parkview Hills that has an elevation that we don’t have any professional pictures of. We decided that we wanted to get some photographs of it, but the “curb appeal” was a little blah. We usually save our professional photos for our model homes and they usually have a little extra landscaping, so this was going to have to be a quick project. I thought it would be an excellent opportunity to demonstrate curb appeal!
So, of course I volunteered to be the landscaper for this one! Since it is a new home, there weren’t any dead trees to remove or major overhauling to do. I thought that a little black mulch would stand out against the white limestone accents on the home and pairing that dark mulch with vivid pink flowers might be the most eye catching combo. I was really excited to be able to buy beautiful sun loving flowers since my own personal garden is so limited. I was going to live vicariously through this East facing sunny garden!
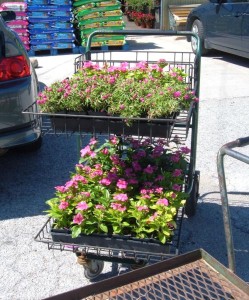
My first stop was Mike’s Garden Center. I love Mike’s because they warranty their plants and they have early bird specials and sales all the time. If you catch a good special you can find flowers for sale at $0.73 per 4” pot. Amazing! Another reason I love my particular Mike’s on Crowley Road is because they are pet friendly. They have their own birdcage and their own shop kitty and three small dogs. One of them accompanied me as I selected my flowers. I loved it!
I bought Vinca and Moss Rose. I love Moss Rose because it is a creeper. It will fluff out and go everywhere. Also it drops seeds like nobody’s business and you will have Moss Rose coming back every year. And, it doesn’t need a whole lot of water. Don’t get me wrong, it needs to be watered, but it is very forgiving of this Texas heat and doesn’t mind drying out a bit. So I loaded up my three flats of Vincas (on sale!) and my one flat of Moss Rose and bought my black mulch.
Of course with all of these plants I needed help getting out of there. The folks who work at Mike’s are always so nice and one guy helped me load up my car. No, you don’t need a truck to haul plants and mulch. I have a two door hatch back and I can get anything in there! I laid down my seats and spread a blanket over the trunk and seats to keep it from getting soiled and me and my Mike’s buddy loaded up my car.

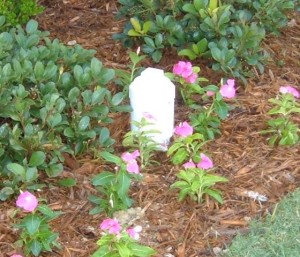
When I got to the home I quickly took a couple of “Before” pictures and got to work. I have found that it is easier for me if I lay the plants out where I want them to go first. So I unloaded all of my flats and got to work. I knew I wanted the Moss Rose to go along the walkway to the entry since it would look pretty there as it began to creep out of the flower bed once it became established. Vincas will get thick, so I also wanted to make sure I placed them far enough apart to not compete with each other for sunlight. I also wanted to make sure I planted thickly against the ugly white washout stub in the flowerbed. You know that thing that looks like a pipe with a lid on it? You have got to be careful when you are gardening not to completely cover it since you need to know where it is in case you have to snake your sewer line out to the street.
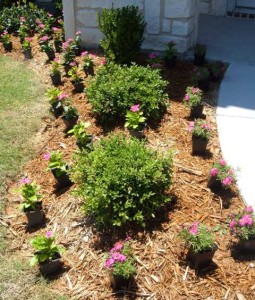
Once I had my flowers laid out, I just had to get to work! I used a little gardening spade to dig in the earth.
As I was digging I quickly noticed that the ground was very clay-ey. When I was at Mike’s I wondered to myself whether or not I should buy some potting soil, but I decided against it. Well, I regretted that decision! But, since I wasn’t removing the old mulch, just adding the new mulch on top, I figured it would be ok. In my opinion the best way to convert a clay based flower bed to better soil is to dump lots of mulch on it every Spring and Fall. That’s what I did at my home over the past six years and now I have this incredibly rich soil full of grody earth worms! They make for healthy plants and occasional frights while planting.
After hours of backbreaking digging and planting, the clouds parted (not really) and a ray of sunshine (it had been sunny and sweltering all day) fell on the pretty new flowerbed. I was pooped and the thought of adding the mulch made me have a heatstroke. So I popped on over to Mr. Bentley’s house next door to lounge on his deck and take a couple of pictures of his awesome view. He’s going to be the subject of the next Celebrity Gossip post.

The next morning I was at the home bright and early to spread the mulch. Sounds easy enough right? Right! Today I was wearing my heart rate monitor because I thought I needed to know exactly what my caloric commitment was to this project. It was a day late and the majority of it was done, but I figured I could do some math and guess. Mulching burned 640 calories! Yay! Ok, way off topic.
Anywhoo, I had four bags of black mulch and I laid them out near the places I thought they would be going. I opened each one and threw the mulch out and covered up all the old mulch. Occasionally I had to free some leaves or petals from under a little bit too much mulch, but it was pretty quick work. The only problem was that I forgot about the tree in the yard. That made me a bag short. So I spread it as best I could and it was a little thin at the end. I was regretting that I didn’t start at the entry and work my way out. So when I was running out of mulch, I was at the most important place! Oh well. Since I was sooooooooo tired after I finished, I decided I would finish the mulch the next time I was at Parkview Hills. By the time you read this, it will all be complete. But I did manage to take pictures with what I was able to cover and from the street, you can’t even tell I ran out!
By the end, I was pretty impressed with the effect that some flowers and mulch had on the appearance of the home. What do you think?


